


How Sterilization Works For Baby Feeding Essentials (And Why It's Crucial For Their Health)
Your baby's immune system is still learning how to fight things. A contaminated bottle that wouldn't bother you or me? For them, it's a potential infection waiting to happen.
Diarrhea. Vomiting.. Respiratory infections. All from a bottle you thought was clean.
Yeah, you probably washed it with soap. Rinsed it thoroughly under hot water. It seems spotless, but what you can't see, what soap and water don't touch, are the bacterial colonies forming in the microscopic crevices of that nipple. The milk residue trapped in the threads of the bottle ring. The biofilm is building up inside the vent system.
What most parents don't realize: is that washing alone, just removes visible milk. But sterilizing kills even the bacteria, viruses, and fungi that survive washing. The microorganisms that cause illness. And in the first year, especially the first six months, that difference matters more than you think.
Why do babies need it?
Adults have fully developed immune systems. We've been exposed to thousands of bacteria over our lifetime. Our bodies know how to fight them. Newborns haven't. Their immune defenses are still building. What's harmless to you can make them severely ill.
According to the Royal Children's Hospital Melbourne, babies under 12 months, especially under 6 months, are at significantly higher risk of gastrointestinal and respiratory infections from contaminated feeding equipment.1 Their stomach acid isn't strong enough to kill bacteria the way ours does. Their gut flora isn't established yet. Their antibodies are still forming. A contaminated bottle that gives you mild discomfort? For them, it's hospital-level serious. That's not fear-mongering, it’s just physiology.
The Bacteria You Don't See Your Baby Drinking…
Even after washing, bottles harbor bacteria in places you can't reach.
-
Inside nipple holes: Milk proteins get stuck in those tiny openings. Perfect breeding ground for bacteria.
-
Bottle threads: Where the ring screws on. Liquid gets trapped in the grooves. Washing doesn't fully clear it.
-
Vent systems: The internal parts of anti-colic bottles. Milk residue builds up in chambers and tubes.
-
Nipple base: Where it connects to the ring. Moisture gets trapped, creating a warm environment that bacteria love.
The longer bottles sit between washes, the more bacteria multiply. And some bacteria like E. coli, Salmonella, and Cronobacter… can even be life-threatening.
Cronobacter sakazakii specifically thrives in powdered formula and bottle equipment. It causes meningitis, sepsis, and has a mortality rate of up to 40% in infected infants, per research from Restored CDC. That's not something soap and water can eliminate. That requires sterilization.
How Different Sterilization Methods Actually Work
Not all sterilization is equal. Some methods kill everything. Others just reduce bacterial load.
-
Boiling
The oldest method. Still effective.
-
How it works: Submerge bottles, nipples, rings, and parts in boiling water for 5-10 minutes. Heat kills bacteria, viruses, and fungi through protein denaturation.
-
Pros: Free. Doesn't require special equipment. Kills effectively.
-
Cons: Time-consuming. Can damage some plastics and silicone over time with repeated boiling. Doesn't keep items sterile once removed, recontamination happens fast.
Best for parents without access to sterilizers. Travel situations. Occasional use.
-
Steam Sterilization
Uses high-temperature steam to kill microorganisms.
-
How it works: Electric or microwave sterilizers heat water to produce steam at around 100°C, which penetrates materials and kills bacteria.
-
Pros: Fast (usually 5-15 minutes). Keeps items sterile for hours if unit stays closed. Doesn't damage materials. Can sterilize multiple bottles at once.
-
Cons: Requires equipment purchase. Needs distilled water to prevent mineral buildup. Takes up counter space.
Best for daily use and parents that sterilize multiple bottles regularly.
The Australian Breastfeeding Association recommends steam sterilization as the most reliable method for consistent daily use.
-
Cold Water Sterilization
Uses chemical tablets or solution.
-
How it works: Bottles are submerged in water with a sterilizing solution (usually sodium hypochlorite) for 15-30 minutes. Chemical kills bacteria.
-
Pros: Doesn't require heat or electricity. Portable. Works anywhere.
-
Cons: Chemical residue if not rinsed properly. Solution needs to be changed every 24 hours. Slower than steam. Can leave a slight taste/smell.
Best for travel, and situations without access to power or boiling water.
-
UV Sterilization
Uses ultraviolet light to kill microorganisms.
-
How it works: UV-C light damages bacterial DNA, preventing reproduction and killing cells.
-
Pros: No heat, no chemicals, no water needed. Very fast (usually 3-5 minutes). No risk of material damage.
-
Cons: Only sterilizes surfaces light reaches—doesn't penetrate into crevices or vent systems. Expensive equipment. Requires regular bulb replacement.
Best for parents wanting a chemical-free, fast option. Works well for pacifiers and nipples but is less effective for complex bottle parts.
How Often Should You Actually Sterilize?
The answer depends on your baby's age and health status.
0-3 Months
Sterilize after every single use. Their immune system is at its weakest. Risk of serious infection from contaminated bottles is highest. Wash immediately after use, then sterilize before the next feed.
3-6 Months
Sterilize daily, especially if the baby's had an illness recently or if using powdered formula. Can be reduced to once daily if the baby's healthy and you're washing bottles thoroughly between uses.
6-12 Months
Once daily sterilization is usually sufficient if the baby's healthy and bottles are washed properly after each use. Some parents stop sterilizing entirely around 6 months when the baby starts eating solids and putting non-sterile objects in their mouth anyway. However, Queensland Health recommends continuing sterilization for 12 months, especially for immunocompromised babies or those in daycare settings.4
After 12 Months
Sterilization becomes optional for most healthy babies. Thorough washing with hot soapy water is usually sufficient once their immune system is more developed. Continue if the baby's ill, premature, or has immune issues.
The Parts Everyone Forgets to Sterilize
You sterilize the bottle and nipple. But what about everything else? They’re equally as important as long as they go into your baby’s mouth or is used during feed.
-
Bottle rings and caps: Touch milk residue. Vent systems and internal parts: Anti-colic bottles have chambers, tubes, inserts that need sterilizing too
-
Measuring scoops for formula: They touch powder, go into the tin, then back into bottles.
-
Bottle brushes: Used to clean milk residue. Become contaminated themselves. Need to be sterilized weekly.
-
Dummies and teethers: Go in baby's mouth constantly. Should be sterilized as often as bottles.
How to Sterilize Feeding Accessiories Properly?
Step 1: Wash first
Sterilization doesn't work on dirty equipment. Milk residue protects bacteria from heat and chemicals. Disassemble everything completely. Wash each part with hot soapy water. Use a bottle brush to scrub inside bottles and nipples.
Rinse thoroughly under running water.
Step 2: Check for damage
Cracked nipples, cloudy plastic, worn vent parts, these harbor bacteria that sterilization may not reach. Replace them.
Step 3: Sterilize
Whichever method you choose, follow timing exactly.
Boiling: 5-10 minutes at rolling boil.
Steam sterilizer: Follow manufacturer's instructions (usually 5-15 minutes).
Cold water: Full submersion for 15-30 minutes minimum.
Step 4: Keep sterile until use
Don't remove items from the sterilizer until you're ready to use them. If using boiling, transfer to a clean container with tongs (not your hands) and cover immediately. Items stay sterile for about 12 hours if kept covered and untouched.
Step 5: Let dry properly
Air dry on a clean surface. Don't use a tea towel, that recontaminates everything. Store dry bottles in a sealed container until next use..
What Happens When You Skip Sterilization?
Most of the time? Nothing visible. Your baby drinks from an unsterilized bottle and seems fine. But the buildup of bacteria is cumulative. It's not one contaminated feed that causes problems; it's repeated exposure over days and weeks.
What you might see:
-
Diarrhea and vomiting: Bacterial gastroenteritis from E. coli, Salmonella, or Campylobacter.
-
Oral thrush: White patches in mouth, refusal to feed. Caused by Candida fungal overgrowth.
-
Respiratory infections: Bacteria inhaled during feeding can cause pneumonia or bronchitis in vulnerable infants.
-
Failure to thrive: Chronic low-level infections can interfere with nutrient absorption and weight gain.
-
Severe infections: Rare but possible, sepsis, meningitis from Cronobacter or other pathogens.
Sydney Children's Hospital reports that contaminated feeding equipment remains one of the leading preventable causes of infant hospitalization for infection in Australia.2 The younger your baby, the higher the risk. Premature babies, low birth weight babies, and immunocompromised babies face the most danger.
When Can You Stop Worrying About It?
Once your baby's immune system matures, usually around 12 months, sterilization becomes less critical. They're eating solids, putting toys in their mouth, and crawling on floors. Exposure to environmental bacteria is constant and normal.
Thorough washing with hot soapy water becomes sufficient for most healthy babies.
Continue sterilizing longer if:
-
The baby was premature or of low birth weight
-
Baby has immune system issues
-
Baby attends daycare (higher infection exposure)
-
Baby's been ill recently
-
You're using powdered formula (higher Cronobacter risk)
When in doubt, ask your GP or child health nurse. They know your baby's specific situation and risk factors.
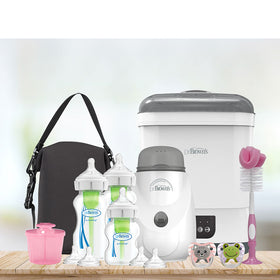
What Makes Sterilization Easier…
Simpler designs mean less time disassembling, washing, sterilizing, and reassembling.
Dr Brown's Options+ bottles let you use the vent system when needed (for younger babies prone to gas), but remove it as the baby gets older.
Fewer parts = faster, easier sterilization without sacrificing the anti-colic benefits when you need them. Not all anti-colic bottles give you that flexibility.
Explore Dr Brown's Options+ bottles - for easier cleaning and sterilization without compromising baby's comfort at drbrowns.com.au